
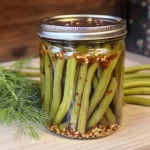
Spicy Garlic & Dill Pickled Beans Recipe is a delightful way to preserve fresh green beans with a zesty kick. This recipe is perfect for summer barbecues, holiday gatherings, or simply as a delicious snack straight from the jar. The combination of garlic and dill enhances the flavor while the chili adds just the right amount of heat. Whether you’re a beginner or an experienced canner, this recipe offers a simple yet flavorful way to enjoy pickled beans all year round.
Why You’ll Love This Recipe
- Easy to Make: This recipe requires minimal preparation and cooking time, making it accessible for everyone.
- Flavor Explosion: The combination of garlic, dill, and chili creates a unique flavor profile that elevates any meal.
- Versatile Use: Enjoy these pickled beans as a snack, in salads, or alongside your favorite dishes.
- Healthy Snack Option: Packed with nutrients from fresh green beans, this recipe offers a healthy alternative to store-bought snacks.
- Perfect for Gifting: Homemade pickles make thoughtful gifts for friends and family during holidays or special occasions.
Tools and Preparation
Getting ready to make Spicy Garlic & Dill Pickled Beans Recipe requires some essential tools. Having the right equipment ensures that the process goes smoothly and safely.
Essential Tools and Equipment
- Canner
- Jars with lids
- Saucepan
- Measuring cups and spoons
- Tongs
Importance of Each Tool
- Canner: A canner is vital for safely processing jars at high temperatures, ensuring food preservation.
- Jars with lids: Using proper canning jars prevents leaks and maintains freshness over time.
- Saucepan: A sturdy saucepan allows you to bring the brine ingredients to a boil evenly.
Ingredients
For the Pickling Brine
- 3 cups water
- 3 cups white vinegar
- 3 Tbsp. pickling salt
For the Beans
- 4½ lbs. green beans, washed, trimmed and cut into jar-length pieces
- 6 cloves of garlic
- 1½ tsp. dried chilli flakes (divided) OR 6 fresh or dried chilli peppers
- 6 fresh heads of dill seed
How to Make Spicy Garlic & Dill Pickled Beans Recipe
Step 1: Prepare Your Canner and Jars
Ensure your canner is set up properly and all jars are clean and sterilized before you start.
Step 2: Prep the Beans
Wash and trim vine ends off beans. Remove strings from string bean varieties. Cut beans into jar-length pieces, leaving about ½ inch of headspace at the top of each jar.
Step 3: Make the Brine
In a saucepan, combine salt, water, and vinegar. Bring this mixture to a boil over medium-high heat while stirring until all salt dissolves completely.
Step 4: Fill the Jars
Remove jars from the canner. In each hot jar, place one clove of garlic, ¼ teaspoon of dried chili flakes (or one whole chili pepper), and one head of dill.
Step 5: Pack in Beans
Pack each jar tightly with beans until you can’t fit any more in. Pour the hot vinegar brine over them while leaving ½ inch of headspace.
Step 6: Remove Air Bubbles
Gently jiggle jars to allow any trapped air bubbles to escape. Wipe down rims with a clean cloth before placing lids on top and screwing bands down to fingertip tightness.
Step 7: Process Jars
Process jars in a boiling hot water bath for 10 minutes. Afterward, remove the canner lid but wait an additional five minutes before taking out jars. Allow them to cool completely before storing them in a cool dark place.
Enjoy your homemade Spicy Garlic & Dill Pickled Beans!
How to Serve Spicy Garlic & Dill Pickled Beans Recipe
Spicy Garlic & Dill Pickled Beans are a versatile dish that can enhance many meals. You can enjoy them in various ways, whether as a crunchy snack or a zesty addition to your favorite dishes. Here are some serving suggestions to elevate your dining experience.
As a Snack
- Enjoy spicy garlic dill beans straight from the jar for a quick and flavorful snack.
- Pair with cheese platters to add a tangy crunch that complements rich cheeses.
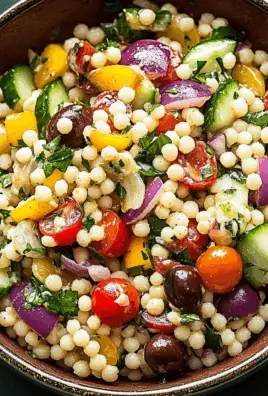
In Salads
- Toss into green salads for an extra kick and vibrant color.
- Add to pasta salads for an unexpected burst of flavor and texture.
On Sandwiches
- Layer on sandwiches or wraps for added crunch and spice that brightens up any filling.
- Use as a topping for burgers to create a unique flavor combination.
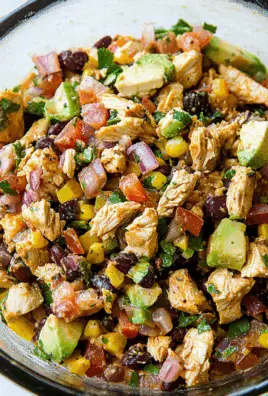
With Grilled Meats
- Serve alongside grilled chicken or pork as a refreshing side that balances rich flavors.
- Incorporate into tacos for an exciting twist on traditional toppings.
As a Garnish
- Use as a garnish in cocktails, such as Bloody Marys, for an added spicy edge.
- Top off your favorite dips with chopped pickled beans to give them an extra zing.

How to Perfect Spicy Garlic & Dill Pickled Beans Recipe
To master the Spicy Garlic & Dill Pickled Beans recipe, consider these tips that can help you achieve the best flavor and texture.
- Use fresh ingredients: Ensure the green beans are crisp and fresh for optimal crunchiness.
- Adjust spice levels: Modify the amount of dried chili flakes or peppers based on your heat preference.
- Ensure proper headspace: Leave enough headspace in the jars to allow for expansion during processing, which prevents spills.
- Cool down jars properly: Allow jars to cool completely before storing them; this helps with sealing and flavor enhancement.
- Store correctly: Keep the jars in a cool, dark place to maintain freshness and taste over time.
- Experiment with herbs: Feel free to add other herbs like thyme or oregano for different flavor profiles!
Best Side Dishes for Spicy Garlic & Dill Pickled Beans Recipe
Spicy Garlic & Dill Pickled Beans make an excellent accompaniment to many meals. Here are some side dishes that pair beautifully with this recipe.
- Coleslaw: A creamy or vinegar-based slaw adds crunch and balances the spiciness of the beans.
- Cornbread: The sweetness of cornbread complements the tangy and spicy notes of pickled beans perfectly.
- Potato Salad: Creamy potato salad creates a hearty side that contrasts well with the bright flavors of pickled beans.
- Grilled Vegetables: Smoky grilled vegetables enhance the overall meal while providing additional textures.
- Rice Pilaf: A herbed rice pilaf serves as a mild base that allows the pickled beans’ flavors to stand out.
- Roasted Chicken Thighs: Juicy roasted thighs offer savory richness that pairs nicely with zesty pickles.
Common Mistakes to Avoid
When making your Spicy Garlic & Dill Pickled Beans Recipe, a few common mistakes can affect the final product. Avoiding these will help you achieve better results.
- Ignoring headspace: Not leaving enough headspace at the top of the jar can cause overflow during processing. Make sure to leave a ½ inch of space.
- Incorrect salt measurement: Using too much or too little pickling salt can ruin the flavor. Always measure accurately using tablespoons.
- Skipping sterilization: Failing to properly sterilize jars can lead to spoilage. Always ensure your jars are clean and hot before filling them.
- Not packing jars tightly: Packing beans too loosely may lead to floating or uneven pickling. Pack them in snugly for the best results.
- Overcooking beans: Cooking beans for too long before pickling can make them mushy. They should be crisp yet tender when packed into jars.
Refrigerator Storage
- Store your Spicy Garlic & Dill Pickled Beans in airtight containers.
- They will last up to 2 months in the refrigerator after opening.
Freezing Spicy Garlic & Dill Pickled Beans Recipe
- It is not recommended to freeze pickled beans as it may affect their texture and flavor.
- For best quality, consume within 2 months of refrigeration.
Reheating Spicy Garlic & Dill Pickled Beans Recipe
- Oven: Preheat oven to 350°F (175°C) and warm the beans in a covered dish for about 15 minutes.
- Microwave: Place beans in a microwave-safe container with a lid and heat for 1-2 minutes, stirring halfway through.
- Stovetop: Heat beans in a saucepan over medium heat until warmed through, about 5-7 minutes.
Frequently Asked Questions
How long do Spicy Garlic & Dill Pickled Beans last?
Spicy Garlic & Dill Pickled Beans can last for up to 2 months in the refrigerator after opening, provided they are stored in an airtight container.
Can I adjust the spice level in my Spicy Garlic & Dill Pickled Beans Recipe?
Yes! You can modify the amount of dried chili flakes or fresh chili peppers according to your taste preferences.
What type of green beans should I use?
You can use any variety of green beans for this recipe, such as snap or string beans. Choose fresh, firm beans for the best results.
Can I reuse pickling brine from this recipe?
It’s best not to reuse pickling brine as it may lose its flavor and acidity over time. Always prepare fresh brine for new batches.
Final Thoughts
This Spicy Garlic & Dill Pickled Beans Recipe is not only delicious but also versatile. Whether served as a snack or a side dish, these pickled beans add a zesty kick to any meal. Feel free to customize the spice levels or add additional herbs based on your preference!
Spicy Garlic & Dill Pickled Beans
- Total Time: 40 minutes
- Yield: Approximately 6 servings 1x
Description
Spicy Garlic & Dill Pickled Beans are a tantalizing treat that combines the crunch of fresh green beans with a zesty kick from garlic, dill, and chili. Perfect for summer barbecues or as a flavorful snack straight from the jar, this easy recipe allows you to enjoy preserved beans year-round. The aromatic blend of ingredients creates a burst of flavor that enhances salads, sandwiches, and more. Plus, they make thoughtful gifts for friends and family during special occasions. Whether you’re new to canning or an experienced pro, this recipe offers a simple way to elevate your culinary skills.
Ingredients
- 4½ lbs. fresh green beans
- 6 cloves garlic
- 3 cups water
- 3 cups white vinegar
- 3 Tbsp. pickling salt
- 1½ tsp. dried chili flakes (or fresh chili peppers)
- 6 heads fresh dill
Instructions
- Prepare your canner and sterilize jars.
- Wash and trim green beans, cutting them into jar-length pieces.
- In a saucepan, combine water, vinegar, and salt; bring to a boil.
- Remove jars from the canner; add garlic, chili flakes/peppers, and dill to each.
- Pack jars with green beans tightly and pour hot brine over them.
- Remove air bubbles, wipe rims clean, then seal with lids.
- Process in boiling water for 10 minutes; cool before storing.
- Prep Time: 30 minutes
- Cook Time: 10 minutes
- Category: Snack
- Method: Canning
- Cuisine: Preserved
Nutrition
- Serving Size: 1 cup (240g)
- Calories: 60
- Sugar: 2g
- Sodium: 800mg
- Fat: 0g
- Saturated Fat: 0g
- Unsaturated Fat: 0g
- Trans Fat: 0g
- Carbohydrates: 13g
- Fiber: 5g
- Protein: 3g
- Cholesterol: 0mg
Leave a Comment